In the digital age, where online shopping dominates, captivating product photography has become essential for businesses to grab the attention of potential customers. Whether you’re a small business owner, an aspiring photographer, or an e-commerce enthusiast, learning the art of stunning product photography can make a significant difference in your marketing efforts. This beginner’s guide will equip you with the essential knowledge and techniques to create stunning product photos that stand out in 2023.
How to shoot photos of your product
1. Prepare Your Equipment
Gather your photography equipment, including a camera (DSLR, mirrorless, or even a high-quality smartphone camera), a tripod for stability, suitable lenses (preferably a macro lens or a lens with a focal length suitable for product photography), and lighting equipment (such as studio lights or natural light sources).
2. Set Up Your Shooting Space
Find a well-lit area with ample space to set up your shooting area. If shooting indoors, consider using a room with large windows to take advantage of natural light. Alternatively, set up a controlled lighting environment with studio lights. Clear the area of any clutter or distractions that may divert attention from your product.
3. Clean and Prepare Your Product
Before shooting, ensure that your product is clean, free from dust, fingerprints, or any imperfections. Take the time to carefully arrange and style your product, considering any props or background elements that enhance the overall composition. Keep the focus on your product and avoid cluttering the frame.
4. Plan Your Composition
Decide on the composition that best showcases your product’s unique features and highlights its selling points. Consider the rule of thirds, leading lines, and negative space to create an aesthetically pleasing composition. Experiment with different angles and perspectives to find the most visually appealing shot.
5. Lighting Setup
Proper lighting is crucial for product photography. If using natural light, position your product near a window or use diffusers to soften harsh sunlight. For studio lighting, position your lights to eliminate shadows and create even illumination. Consider using light modifiers like softboxes or reflectors to control the intensity and direction of light.
6. Adjust Camera Settings
Set your camera to manual mode for complete control over the exposure settings. Adjust the aperture (f-stop) to control depth of field, ensuring your product is in sharp focus while achieving a pleasing background blur if desired. Set the ISO to the lowest possible value to minimize digital noise. Adjust the shutter speed accordingly to achieve proper exposure.
7. Focus and Capture
Take test shots to ensure proper focus and exposure. Use autofocus or manual focus to ensure your product is sharp and in focus. Utilize the camera’s gridlines or focus peaking feature to assist with precise focus. Take multiple shots from different angles and perspectives to provide variety and options during the editing process.
8. Review and Refine
Review the shots on your camera’s LCD screen to evaluate the results. Look for any areas that may need improvement or adjustments, such as lighting, composition, or product positioning. Make necessary changes, fine-tune the setup, and capture additional shots as needed until you’re satisfied with the results.
9. Photo Post-Processing
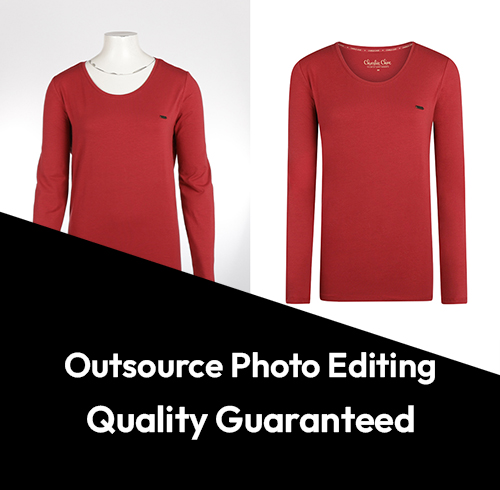
Review the shots on your camera’s LCD screen to evaluate the results. Look for any areas that may need improvement or adjustments, such as lighting, composition, or product positioning. Make necessary changes, fine-tune the setup, and capture additional shots as needed until you’re satisfied with the results. and use Photoshop to crop, retouch, and make clean background or replace the background. If you need it done faster use clipping path company
Remember, practice and experimentation are key to improving your product photography skills. Continuously refine your techniques, explore different styles, and draw inspiration from other photographers and industry trends to create compelling product images that effectively showcase your products.
How to Become a Professional Product Photographer?
Becoming a professional product photographer requires a combination of skill, knowledge, experience, and a proactive approach to building your career. Here are some steps to help you on your path to becoming a professional product photographer:
1. Learn the Fundamentals of Product Photography
Basic knowledge is an important part of every skill, and for product photography, you must first learn the basics of composition, lighting, exposure, and camera settings. Familiarize yourself with different genres of photography, including product photography. Take courses, workshops, or pursue formal education to acquire technical knowledge and practical skills.
2. Invest in Quality Equipment
Invest in a good camera, lenses suitable for product photography (such as macro lenses or lenses with appropriate focal lengths), tripods, lighting equipment, and accessories. Quality equipment will help you capture high-resolution images with clarity and detail.
3. Practice Regularly
Practice is key to honing your skills. Set up a small studio space at home or rent a studio if needed. Regularly shoot products, experimenting with different lighting setups, compositions, and styles. Pay attention to details and strive for perfection in each shot.
4. Build a Portfolio
Create a professional portfolio showcasing your best product photography work. Your portfolio should demonstrate your range of skills, creativity, and ability to capture products effectively. Select a diverse range of products to showcase your versatility and show your ability to adapt to different styles and requirements.
5. Collaborate with Businesses
Reach out to local businesses, start-ups, or e-commerce platforms and offer your services as a product photographer. Offer to shoot their products in exchange for permission to use the images in your portfolio. Collaborating with businesses not only helps you build your portfolio but also establishes valuable connections and potential clients.
6. Learn Editing and Post-Processing
Learn how to edit and post-process your product images using software such as Adobe Photoshop or Lightroom. Understanding editing techniques will help you enhance the visual appeal of your photos, correct any imperfections, and maintain a consistent style. If you find the editing process challenging, consider utilizing the services of a professional clipping path company or outsourcing platform to ensure high-quality photo editing.
7. Continuously Improve and Stay Updated
Product photography trends and techniques evolve over time. Stay updated with the latest industry trends, technology advancements, and editing techniques. Attend workshops, webinars, or seminars to further develop your skills and knowledge. Regularly evaluate your work and seek constructive feedback from mentors or peers to identify areas for improvement.
Becoming a professional product photographer takes time and dedication. Focus on building your skills, expanding your portfolio, and establishing a strong network. With persistence, continuous learning, and a passion for your craft, you can turn your passion for product photography into a successful profession.
The Art of Lighting in Product Photography
In product photography, the art of lighting plays a pivotal role in creating captivating images. This section explores the techniques and principles behind effective lighting setups. From utilizing natural light to mastering studio lighting, learn how to control shadows, highlights, and reflections to highlight the product’s features and create a visually stunning composition. Discover how lighting techniques can evoke moods, enhance textures, and bring out the product’s unique qualities. Mastering the art of lighting is crucial for achieving professional and impactful product photography results.
Mastering Product Styling for Visual Appeal
Styling your product is an essential aspect of product photography that can greatly impact the overall visual appeal of your images. This section delves into the art of product styling and provides valuable insights on how to showcase your product in the most attractive and engaging way. Explore techniques for arranging props, choosing suitable backgrounds, and creating compelling compositions that complement and enhance your product. Learn how to strike a balance between simplicity and creativity, ensuring that your styling choices enhance the product’s unique features without overpowering it. By mastering the art of product styling, you can create visually captivating images that capture the attention of your audience and effectively communicate the essence of your product.

Mahafuz Alam
Mahafuz Alam is a talented creative content writer with a deep passion for photography and photo editing. With an eye for detail and a keen understanding of visual aesthetics, Mahafuz expertly crafts engaging and informative articles that delve into the world of photography and the art of photo editing.